TUTORIAL: MULTICOLOR TILE
GENERATING TILES
So make sure that the image has a homogeneous white color (0xffffff) on the bottom of the eyes and a black (0x000000) on the background. At this point, save the image by exporting it as a PNG with the name mctile_ghost.png. Now you must create a completely black image, still 16×16 pixels, and save it as mctile_empty.png.
Now you must call the img2tile program with the following command line (please correct the paths accordingly with your configuration):
img2tile -v -m -i mctile_empty.png -i mctile_ghost.png -o tutorial_mctile.bin -g tutorial_mctile.h
 This command has the following meaning:
-vverbose (“write explictly what you do”);-menable multicolor support;-i mctile_empty.pngindicates the first file to insert in the tileset;-i mctile_ghost.pngindicates the second file to add to the tileset;-o tutorial_mctile.binindicates the file where the multicolor tileset will be saved;-g tutorial_mctile.hindicates the include file, which is needed for compilation.
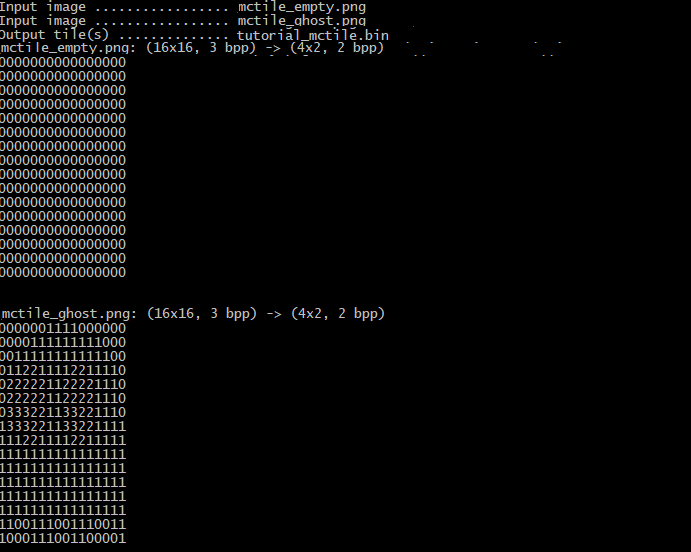
Running the program displays a series of numbers, which represent the index chosen by the program for each color of the generated images. The choice depends on the order in which the tile pixels are presented.

In the example produced, the first color (index 0) is black and is that of the background. The second color (index 1) is red and is that of the ghost's “dress”. The third color (index 2) is white, and is the background of the eyes. Finally, the last (index 3) is the color of the inside of the eyes.
Return to tutorial.